JAVA项目实战瑞吉外卖—day2
新增员工
执行过程
- 页面发生ajax请求,将新增员工页面中输入的数据以json的形式提交到服务器
- 服务端Controller接收页面提交的数据并调用Service将数据进行保存
- Service调用Mapper操作数据库,保存数据
根据前端请求地址为Post没加任何参数,所以只用PostMapping就可以了
编写新增员工接口
1
2
3
4
5
6
7
8
9
10
11
12
13
14
15
16
17
18
19
20
21
22
23
24
|
@PostMapping
public R<String> save(HttpServletRequest request, @RequestBody Employee employee){
log.info("员工消息:{}",employee.toString());
employee.setPassword(DigestUtils.md5DigestAsHex("123456".getBytes()));
employee.setCreateTime(LocalDateTime.now());
employee.setUpdateTime(LocalDateTime.now());
Long empId = (Long) request.getSession().getAttribute("employee");
employee.setCreateUser(empId);
employee.setUpdateUser(empId);
employeeService.save(employee);
return R.success("新增员工成功!");
}
|
在设置当前创建人的时候,因为在Session域中存放的是当前登录用户的id并且是Long类型,需要转换类型且将id写入新创建的员工信息表内
新增员工逻辑判断
在新增用户的时候,需要进行账号校验,因为账号是唯一登录信息,进行检验的时候,不能用重复的用户账号,需要抛出异常,但是传统的try catch太过于臃肿,所以写了全局异常处理器,集中处理异常
部分校验:手机号,身份证号等前端已经校验完成
@ControllerAdvice(annotations = {RestController.class, Controller.class}):指定含有该注解的进行异常捕捉
@RestControllerAdvice:只捕捉RestController注解的类
1
2
3
4
5
6
7
8
9
10
11
12
13
14
15
16
17
18
19
20
21
22
| @ControllerAdvice(annotations = {RestController.class, Controller.class})
@Slf4j
@ResponseBody
public class GlobalExceptionHandler {
@ExceptionHandler(SQLIntegrityConstraintViolationException.class)
public R<String> exceptionHandler(SQLIntegrityConstraintViolationException ex){
log.error(ex.getMessage());
if (ex.getMessage().contains("Duplicate entry")){
String[] split = ex.getMessage().split(" ");
String msg = split[2] + "已存在";
return R.error(msg);
}
return R.error("未知错误");
}
}
|
员工信息分页查询
执行过程
- 1、页面发送ajax请求,将分页查询拳数(page pagesize name)捉交到服务端
- 2、服务端Controller接收页面提交的数据并调用Service查询数据
- 3、Service调用Mapper操作数据库,查询分页数据
- 4、 Controller将查询到的分页数据响应给页面
- 5、页面接收到分页数据并通过Elementui的Table组件展示到页面上
编写MyBatisPlus分页插件
需要使用@Configuration注解指定该类是配置类
使用@Bean标签将MybatisPlusInterceptor交给spring管理
1
2
3
4
5
6
7
8
9
10
| @Configuration
public class MybatisPlusConfig {
@Bean
public MybatisPlusInterceptor mybatisPlusInterceptor(){
MybatisPlusInterceptor mybatisPlusInterceptor = new MybatisPlusInterceptor();
mybatisPlusInterceptor.addInnerInterceptor(new PaginationInnerInterceptor());
return mybatisPlusInterceptor;
}
}
|
编写分页接口
在页面上展示有条件查询的部分,当数据多的时候,条件查询数也需要分页显示
1
2
3
4
5
6
7
8
9
10
11
12
13
14
15
16
17
18
19
20
21
22
23
24
25
26
27
28
|
@GetMapping("/page")
public R<Page> page(int page,int pageSize,String name){
log.info("page = {},pageSize = {},name = {}",page,pageSize,name);
Page pageInfo = new Page(page,pageSize);
LambdaQueryWrapper<Employee> queryWrapper = new LambdaQueryWrapper();
queryWrapper.like(StringUtils.isNotEmpty(name),Employee::getName,name);
queryWrapper.orderByDesc(Employee::getUpdateTime);
employeeService.page(pageInfo,queryWrapper);
return R.success(pageInfo);
}
|
前端接收数据是需要查询出来的的list数组,这里将后台查询数据库的员工数据传递给前端的tableData,这样才能在列表上显示
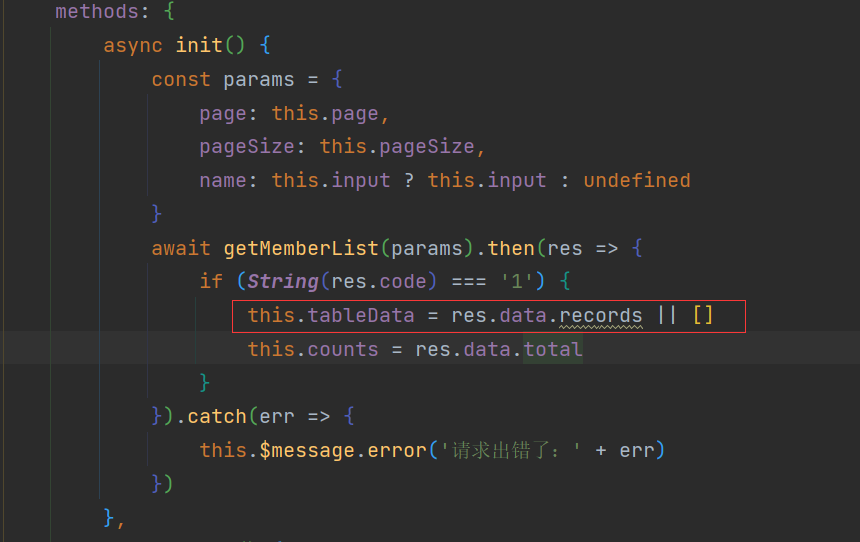
前端使用的是element-ui的分页组件
1
2
3
4
5
6
7
8
9
10
| <el-pagination
class="pageList"
:page-sizes="[10, 20, 30, 40]"
:page-size="pageSize"
layout="total, sizes, prev, pager, next, jumper"
:total="counts"
:current-page.sync="page"
@size-change="handleSizeChange"
@current-change="handleCurrentChange"
></el-pagination>
|
启用/禁用账号
在员工管理列表页面,可以对某个员工账号进行启用或者禁用。账号禁用的员工不能登录系统,启用后的员工可以正常登录。
需要注意的是,只有管理员(admin用户)可以对其他用户进行启用,禁用操作,普通用户不显示启用和禁用按钮
设置只有admin用户显示启用/禁用按钮
钩子函数将当前登录用户的信息赋值给模型数据
index.html
1
2
3
4
5
| created() {
this.init()
this.user = JSON.parse(localStorage.getItem('userInfo')).username
},
|
1
2
3
4
5
6
7
8
9
10
11
| </el-button>
<el-button
type="text"
size="small"
class="delBut non"
@click="statusHandle(scope.row)"
<!--判断是否为admin用户 -->
v-if="user === 'admin'"
>
{{ scope.row.status == '1' ? '禁用' : '启用' }}
</el-button>
|
启用/禁用账号开发流程
- 页面发送ajax请求,将参数(id,status)提交到服务端
- 的味道Controller接收页面提交的数据并调用Service更新数据
- Service调用Mapper操作数据库
编写update接口
因为修改状态信息就是更新信息可以和编辑按钮共用update方法
1
2
3
4
5
6
7
8
9
10
11
12
13
14
15
16
|
@PutMapping
public R<String> update(HttpServletRequest request,@RequestBody Employee employee){
log.info(employee.toString());
Long empId = (Long) request.getSession().getAttribute("employee");
employee.setUpdateTime(LocalDateTime.now());
employee.setUpdateUser(empId);
employeeService.updateById(employee);
return R.success("修改成功!");
}
|
注意
因为后端给前端返回的id类型为long类型,而js在数字16位之后便会四舍五入,导致id不匹配无法进行精确修改,解决办法
设置消息转换器
1
2
3
4
5
6
7
8
9
10
11
12
13
14
15
16
|
@Override
protected void extendMessageConverters(List<HttpMessageConverter<?>> converters) {
MappingJackson2HttpMessageConverter messageConverter = new MappingJackson2HttpMessageConverter();
messageConverter.setObjectMapper(new JacksonObjectMapper());
converters.add(0, messageConverter);
}
|
!!!!原来将静态文件放在static目录下没有配置静态资源映射
但是在续写消息转换器的时候,运用到了过滤器所以原本在static能访问的静态资源不能访问,禁用掉资源映射也不行,还是将静态资源放出在resource目录下配置静态资源映射即可访问,原因需要去学习—–todo
编辑员工信息
- 在开发代码之前需要梳理一下操作过程和对应的程序的执行流程:
- 1.点击编辑按钮时.页面跳转到add html 并在url中携带参数 [员工id]
- 2.在add.htm(页面获取ur中的参数 员工id]
- 3.发送ajax请求,请求服务端,周时提交员工id参数
- 4.服务端接收请求,根据员工查询员工信息,将员工信息以jison形式响应给页面
- 5.页面接收服务端响应的json数据, 通过VUE的数据绑定进行员工信息回显
- 6.点击保存按钮.发送司ax请求,将页面中的员工信息以json方式提交给服务蠩
- 7.服务端接收员工信息,并进行处理,完成后给页面响应
- 8.页面接收到服务端响应信息后进行相应处理
钩子函数
在打开新增或者编辑窗口的时候,钩子函数触发去查询有没有id属性,有id属性位编辑页面,根据查询出来的id值,通过根据id查询得到所对应的员工信息,再根据init方法将员工信息赋值给this.ruleForm = res.data 进行数据回显,而编辑过后的信息进行提交则是更新操作,和启用/禁用账号共同使用update接口,因为参数是实体类,所以能够更新信息
1
2
3
4
5
6
7
| created() {
this.id = requestUrlParam('id')
this.actionType = this.id ? 'edit' : 'add'
if (this.id) {
this.init()
}
},
|
根据id查询接口
1
2
3
4
5
6
7
8
9
10
| @GetMapping("/{id}")
public R<Employee> getById(@PathVariable Long id){
log.info("根据员工id查询数据.....");
Employee employee = employeeService.getById(id);
if (employee!=null){
return R.success(employee);
}
return R.error("没有查询到员工信息");
}
|
init方法
通过queryEmployeeById函数来获得id值对应的账号信息将其赋值到 this.ruleForm 进行数据回显
1
2
3
4
5
6
7
8
9
10
11
12
13
| async init () {
queryEmployeeById(this.id).then(res => {
console.log(res)
if (String(res.code) === '1') {
console.log(res.data)
this.ruleForm = res.data
this.ruleForm.sex = res.data.sex === '0' ? '女' : '男'
} else {
this.$message.error(res.msg || '操作失败')
}
})
},
|
解析get请求地址上的id属性
1
2
3
4
5
6
7
8
9
10
11
12
13
14
|
function requestUrlParam(argname){
var url = location.href
var arrStr = url.substring(url.indexOf("?")+1).split("&")
for(var i =0;i<arrStr.length;i++)
{
var loc = arrStr[i].indexOf(argname+"=")
if(loc!=-1){
return arrStr[i].replace(argname+"=","").replace("?","")
}
}
return ""
}
|